


One Room Challenge – Wood Valances

Next up for the One Room Challenge (week 2) is to create wood valances for my window treatments. So come follow along as I show you how to do it too! Make sure you check out all the ladies in this challenge over at OneRoomChallenge.com for lots of inspiration. You will love what these designers are coming up with!

I was looking for a way to decorate these windows and found the most amazing idea on the Shanty2Chic blog (these sisters are my favorite).  These gals are so talented and have the best tutorials. Their DIY Wooden Window Cornice was what I was looking for in this space. I had to change mine up a little and wrote how I did that here, but for sure check out their blog post here to get a good idea about what this entails.
Here’s my 6 week outline:
Project One – Shiplap COST $92.00
Project Two – Window Valences COST $45.00
Project Three – Custom Shutters
Project Four – Blinds
Project Five – Decorating
I will give you a quick review of what the first three weeks have looked like:
Week One: Empty Walls (see the beginning of our journey here)

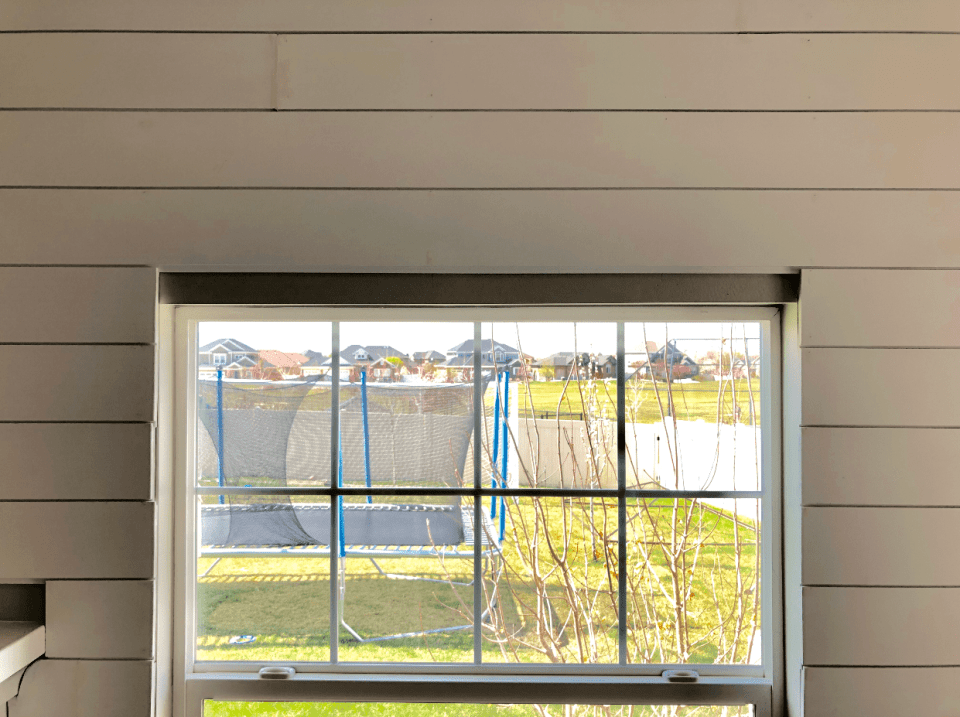
How to Make Wood Valances for a window covering – before photo
Week Two:Â Add Shiplap (read all about it here)

One Room Challenge – first steps
Week Three:Â Add Wood Valances

Ready to learn how to get it done?! Here we go:
Supplies Needed:
- 1×6 Board (two 6-8 feet long)
- 1×4 Board (one 6-8 feet long)
- 1×3 Board (one 6-8 feet long)
- Stain or Paint
- Paint Brush and old rags
- Two Curtain Rods
- Screws (1 1/2 inch)
- Kreg Screws (1 1/2 inch)
- 3 1/2 inch wood screws (I use hex head screws)
Tools Needed:
- Circular Hand Saw
- Sander
- Level
- Cordless Drill
- Kreg Jig (read all about them here and how to use them!)
Here is my 60 second Do It Yourself Video Tutorial so you can get a quick glimpse of how it is to be done!
Step One – Measure Your Windows
Each window is different so I will not be giving you the measurements of my window. But you will understand the measurements you will need create your valance.
- You will need to take the measurement of the window opening and add 2 inches to each side.
- The curtain rods are about 3 1/2 inches deep, so you will plan on 4 1/2 inches on each side of the valance.
Step Two – Buy Your Wood and Rods
Head over to Home Depot to grab your wood. You can find curtain rods there as well, Walmart or order them on amazon. Make sure you grab 2 and that they are the length you need.


Step Three – Cut Your Wood
Grab your circular saw and some saw horses or a table. Make sure you lines are as straight as possible (this is my weakness!).

- You will cut one of the 1×6 pieces to the length of your window plus the 2 inches on each side. Cut two of these. Â
- Length of Window + 2 inches = FIRST CUT (2)
- You will measure the width of your rod – add this measurement plus 1.5 inches. You will make 4 cuts of this measurement using 1×6 pieces.
- Width of rod + 1.5 inches = SECOND CUT (4)
- You will measure the length of your first cut MINUS 1.5 inches (you are going to add this as your top piece and it fits in between the two side brackets of wood – hence the minus 1/5 inches).
- Length of first cut – 1.5 inches = THIRD CUT (2)
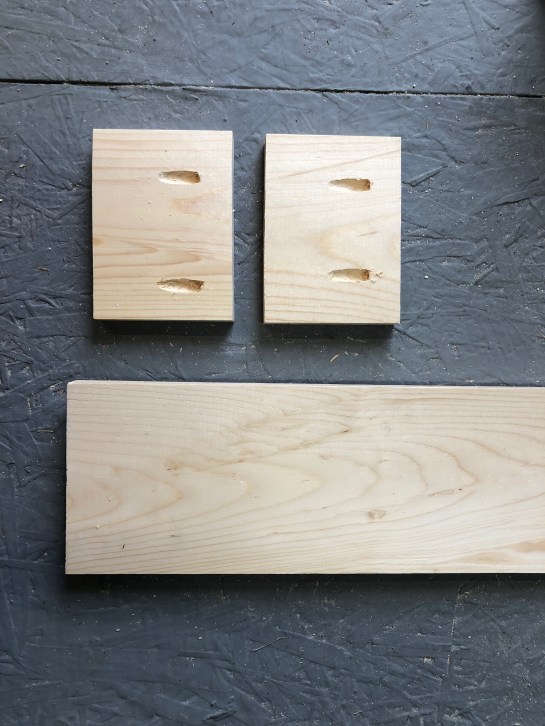
Step Four – Pocket Holes
If you have never drilled pocket holes before you need to read up on this. It isn’t hard, you just need a small amount of training. Refer to my post here on using a Kreg Jig.

Kreg Jig K4 Master System
- You will add ZERO pocket holes to your first cut.
- You will add 2 pocket holes to each second cut.
- You will add 3 pocket holes to each third cut.
Step Five – Put Together Your Valance
Add your side braces to your first cut like this:


Then you will add your second piece. This is the top part of your valance and the way you will attach it onto the wall.

Step Six – Sand and Stain
You will sand down your valance and then wipe off any extra sawdust. Pick your stain and get to work.
I first stained with Varathane Briarsmoke and let dry.

I rubbed on a small layer of Beeswax for a distressed look.

Then I painted with a top coat of Behr Paint and Primer – Tan. Once dry, I sanded lightly and this was my outcome (I LOVED IT!):


Step Seven – Mount Your Rod
You will look for the studs and mount your rod brackets there, at the end of each window.

Step Eight – Attach Your Brace
This is the 1×3 wood piece that you will attach your valance too. Find the studs (this is very important for a secure brace) and mount right above your metal bracket for your rod. This is where you use your hex head 3.5 screws. The hex heads give me more grip with my drill. You need this long to go all the way through your 1×3 brace, the sheet rock, and then into the stud. Use a level to make sure its even, your valance will be crooked if this is not straight.

Step Nine – Attach Your Curtains
Slip your curtains onto your rod and attach it to your window. You are almost done!

Step Ten – Mount Your Valance
You will now add your completed valance. You will lay it over the brace and curtain rod. Make sure it is measured even. You will take your screws and add one on the top middle area of the valance, attaching the top piece of wood to your sturdy brace. Then add one to each end of the valance. See the video tutorial for how I did this.

It is all done! Yah! I love the look it gives this room. I found some darling curtains at TJ Max for inexpensive. Now I get to rest for the weekend before I start my shutters!

Happy Building!
Love,
Kelly


[…] Project Two – Window Valences COST $45.00  Read all about that project here […]
[…] Project Two – Window Valences COST $45.00  Read all about that project here […]
[…] Project Two – Window Valences COST $45.00  Read all about that project here […]
Since I did learn from your finishing technique, I’ll share some wisdom:
I know this is largely a decorative piece, so the strength of the pocket hole connections doesn’t really matter… Which, overall, makes the pocket hole suggestion an unnecessary expense. Pocket holes should combine with glue, and they should work toward the center of the board; not the end. How it was done here is no better than screwing into the end grain, strength wise. A better solution for this particular project would be to bring the boards together with L-brackets screwed to the inside, where they won’t be seen. This is a much stronger, much less expensive and skillful option. Should one want this to double as a shelf, then, they could. Provided, they use pilot holes…
When screwing through a piece of wood near the end grain, drill pilot holes. Otherwise, you get the splitting so prominently featured in the photograph of your ‘strong brace,’ which actually lessens the strength of that connection. Imagine screwing into a group of rubber-banded straws and splitting the rubber band. Pilot holes – the diameter of the shank of the screw, not the thread – remove the ‘wedging’ effect that is actually used TO split wood.
Lastly, please have one of your grammar-Nazi friends help you proofread your posts, and enlist the help of ‘tool people’ to accurately describe tools and techniques used. I’m not real sure what a “circular hand saw” is, but any crosscutting saw would work for this project.
Hope this helps. 😊 God bless!
Holy Cow! I am super impressed, thank you for all the insight you shared. As you can tell I am a DIY home maker and learning as I go. And I love that everyone can try new things and not have to be a professional to create the spaces they want in their home. That is why my followers join me and stay. If we all had to be perfectly educated on tools and installation people would be too scared to try. Hence why I blog and share my learning. You may want to consider blogging and doing some deeper explanations for people who are wanting that in-depth of experience. And we used a standard circular saw from Ridgid, which is the name right on the box. Grammar-Nazi’s? Let’s be gentle now, no need have put downs. You also have a good day.
I love it
[…] a través de City Girl Meets Farmboy […]
[…] Image and tutorial by City Girl Meets Farm Boy […]