Hey Everyone
I'm Kelly Ballard
Raised in California and transplanted to Utah. Married my college sweetheart from Montana, and we are raising 4 nuggets together. I love all things DIY projects and doing them on a budget. I don’t mind messing up and am ok with the 90/10 rule - nothing is perfect over here and it’s fine by me! Encouraging all ‘wanna-be’ DIYers to just get out there and try it! You will be so glad you did.”
Categories
do it yourself
home Decor
family
Shopping
find me on
@citygirlmeetsfarmboy
Do It Yourself – Mini Curtain Rods

Do It Yourself Mini Curtain Rods! You will love these quick and easy rods that add a fun element to your room. Come follow along! I have attached a DIY Video below for further help.
Here is a link to PIN IT FOR LATER!

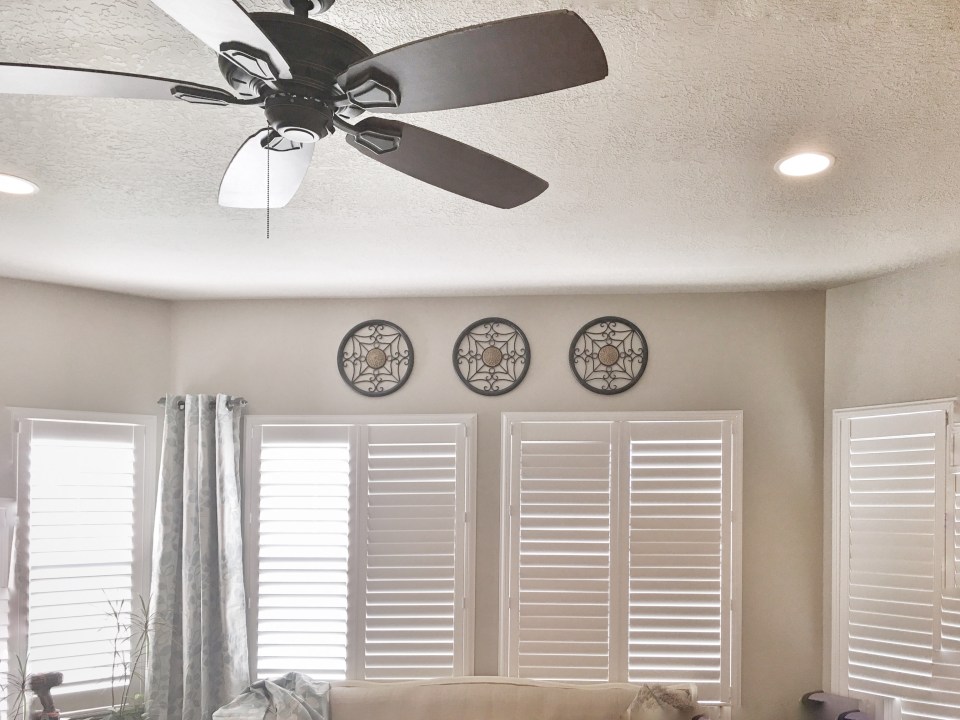
I have been wanting mini curtain rods for some time in this area. I love my shutters that Mr. Farmboy installed from SelectBlinds – we have used them in our last 3 homes and absolutely love the product, the price point and the lifetime warranty. Literally the best blinds out there for the cost, click right here to see the latest sale they are having. (Note: We are not sponsored by Select Blinds and all our opinions are of our own.) I love them so much so I didn’t want curtains to cover them up, just a small addition to spruce up the room. As I shopped I realized I could create my own look and spend very little. I decided to put my ideas to fruition last weekend. Here’s how I did it:
Step One – Cut Your Rods
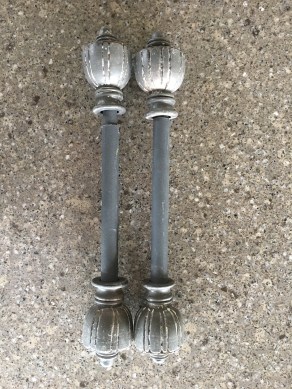
Start out with the curtain rods you would like to use. I had leftover ones in the basement that were perfect. You can find inexpensive ones on Ross Dress For Less or Walmart. I chose to use metals rods, but plastic will work too. I measured the length I needed and used my Dewalt 32 TPI (Teeth Per Inch) saw to make my cuts (Mr. Farmboy had to help me a little):
This is how they turned out:

Step Two – Gather Your Tools
Then I gathered the materials I would need for mounting. My Ridgid 18 Volt Drill, drywall anchor and screws, stud finder, and mounting gear. I always save leftover pieces that I do not use from other curtain rod projects, so these didn’t match the rods perfectly, but I knew they were be covered up so it didn’t matter. Finally, I found the perfect curtains – on clearance at Kohls – plus I used my 30% off coupon. Total for entire project was $10!
Here are my tools:

You can purchase this Zircon Stud Finder, Ridgid 18 Volt Hand Drill, and EZ Anchor Screws at The Home Depot.
Note: We love getting recommendations from people we trust. Why reinvent the wheel if you don’t have too? We want to help our readers with resources that we love. Rest assured that any affiliate link that we post in our blog are companies that we trust and do business with ourselves.
Step Three – Find Your Studs
Ok – now back to it! I used my stud finder to locate where I would like to mount my hooks. I try my best to mount in the studs. If not I will use drywall anchors for more support:
The bars will show you when you are close to the stud, and the light will appear when you are exactly over it. This is my go-to tool for everything I hang.
Step Four – Mount Your Brackets
Next I take apart my curtain rod hooks. They look confusing at first, but make sense once you play with them. The first photo is how it will look completed. The second photo is them taken apart as I prepare to mount them. You will mount the back bracket first, then reattach the hook bracket.
Mounting the back bracket is simple. If you are using the studs you will only need your wood screws to attach it into place. If you are not using studs, I recommend this style of drywall achors – they are my favorite:

Once the back bracket is installed, you will attach the hook bracket and use the screw to tighten it together:

You will then add the hook screw and use it to hold the rod in place, screwing it in to tighten the hold:

Step Five – Add Your Curtains
Now you will add your curtains to your shortened rod, and place it on the hooks. I like to place the end of each curtain over the brackets so they are hidden:

And there you have your first mini curtain rod!

Finish the other side and you are complete. PS – aren’t these shutters beautiful!? Check them out here and see their current sale!

We hope you learned something new – let us know what you think.
Pin this for later my friends, we hop you try it out!
Love,
Kelly

Leave a ReplyCancel reply
Join Me
sign up here to get my best DIY Tutorials straight to your inbox!
A Home Decor & DIY Blog
copyright 2020 Kelly Ballard
designed by Gillian Sarah
earnings disclaimer
follow me on
@citygirlmeetsfarmboy


[…] feet and do it again across the wall. Â Keep doing this until you reach the top of the wall. Â (My post on mini blinds here goes into the stud finder more deeply if it’s your first […]
Can you share which shutters you chose from select blinds? I got overwhelmed quickly when I looked at the options on their website!
Carrie I am so glad you asked! I grabbed the Express Faux Wood Shutters. Super good price point and look amazing. We did the outside window mount option. Message me if you have any other questions!
[…] DIY Mini Curtain Rod […]
Gorgeous! How wide are the curtain panels?
Thank you for asking! They are 4 1/2 feet wide. Pretty standard. I appreciate you stopping by!!
[…] Mini Curtain Rods […]
When you cut the curtain rod, how did you screw the finial in to the cut end?
I cut the inside ends on each side and then slid them together, so the outside ends were still able to add the finial. Does that make sense?
Where did you find the extra finials
[…] feet and do it again across the wall. Â Keep doing this until you reach the top of the wall. Â (My post on mini blinds here goes into the stud finder more deeply if it’s your first […]