Hey Everyone
I'm Kelly Ballard
Raised in California and transplanted to Utah. Married my college sweetheart from Montana, and we are raising 4 nuggets together. I love all things DIY projects and doing them on a budget. I don’t mind messing up and am ok with the 90/10 rule - nothing is perfect over here and it’s fine by me! Encouraging all ‘wanna-be’ DIYers to just get out there and try it! You will be so glad you did.”
Categories
do it yourself
home Decor
family
Shopping
find me on
@citygirlmeetsfarmboy
Laundry Room Renovation – Peel and Stick Wallpaper Installation
Welcome to citygirlmeetsfarmboy! Â I am so glad you are here and hope you find inspiration for your home while visiting. Â Make sure to follow me on instagram here for daily inspiration!

It’s our third week of the One Room Challenge, sponsored by Better Homes and Gardens, and my project is complete! Â Make sure to check out the One Room Challenge Blog to see all the rooms that are being renovated right now, you will find so much inspiration. Â Additionally you can watch all the tutorials for this laundry room renovation on my IGTV channel at CITYGIRLMEETSFARMBOY here.

Here is a recap of my 6 week outline:
Week One – OrigInal Room Reveal (read here)
Week Two – Wood Ceiling (read here)
Week Three – Wallpaper and Cupboards
Week Four – Floating Shelves (read here)
Week Five – Drying Racks and Folding Table (read here)
Week Six – Decorations and Reveal (read here)
This post contains affiliate links to help you navigate to products I have used and am showcasing.
This post is sponsored by Kirkland’s – and you are going to so surprised.  Did you have any idea that they carry wallpaper?  And not only wallpaper, they have so many wall decals on their site that I spent hours trying to decide which pattern I wanted to use for the laundry room.  You can follow my step by step instructions of Wallpops Peel and Stick Wallpaper here during my pantry renovation.
Step One – Pick Your Pattern
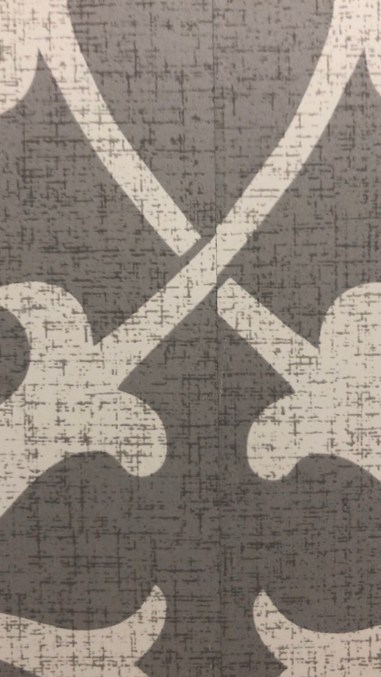
Kirkland’s has so many different patterns of wallpaper on their website, you will love it! Make sure to scroll all the products right here. Â I chose the Gray Ironwork pattern from Wallpops sold on the Kirkland’s site.
Step Two – Align Your Pieces
This part is essential before beginning. Â All the directions are included in your Wallpops instructions. Â Make sure to read them carefully.
Step Three – Prepare the Wall
Wipe down your wall (clean if necessary) and gather your supplies. Â You will need:
- level
- pencil
- scissors
- razor
- dry rag
- spackle tool or straight edge

Step Four – Mount Paper
Again, follow the instructions on mounting the first strip of peel and stick wallpaper. You have to measure 20 inches out from the wall and make a line to match your strip up to. Â You cannot rely on the side wall as it may not be straight. Â You will need to measure 1 millimeter out and then the 20 inches from there. Â This will ensure your line is straight. Â This doesn’t mean that your first strip will set perfectly against the wall. Â Mine was off by a small measurement. Â But if you align it this way you will not end up with crooked strips.

Apply your top portion to the wall, matching the line you made. Â Push out the bubbles with your straight edge as you move down the strip. Â You will also slowly peel off the backing.
When you get to the end, use your straight edge and razor to cut.

To hang the next strip, you will align the paper to the first strip, overlapping the paper by 1 millimeter. This will make sure there is no separation or pulling.
If you look closely you can see the small overlap in center line.

The alignment might be a little off but far away you can not see it.

Continue with this process until your wall is finished.
Give it a really good rub down with your dry rag to ensure that everything is adhering properly. Â And one small tip – for bubbles I couldn’t get out, I poked a very tiny pin hole into them and pushed the air out with my straight edge. Â It worked really well.

I love the way this simple addition changed the look of the whole room. Â What a great transformation!
Next up we added some Ikea shelves to the wall. Â I wanted a gray look that was thin in depth. Â The EKET Cabinet line is perfect because they are super light and easy to install. Â Plus they are inexpensive! Â You can watch the install on my IGTV channel right here.


Make sure to check out Kirklands here to find all the different wallpaper ideas they carry and Ikea here for their Eket Cabinets!
Love,
Kelly

Leave a ReplyCancel reply
Join Me
sign up here to get my best DIY Tutorials straight to your inbox!
A Home Decor & DIY Blog
copyright 2020 Kelly Ballard
designed by Gillian Sarah
earnings disclaimer
follow me on
@citygirlmeetsfarmboy


[…] Week Three – Wallpaper and Cupboards (read here) […]
[…] Week Three – Wallpaper and Cupboards (read here) […]
[…] The back wall will be enhanced by peel and stick wallpaper.  Then I will add floating shelves to create more storage space.  Note: You can read this tutorial here. […]
[…] Week Three – Wallpaper and Cupboards (read here) […]
[…] Week Three – Wallpaper and Cupboards (read here) […]
[…] the normal horizontal way. Never tried peel and stick wallpaper before? Check out my posts here and here to see more tutorials on […]
[…] Week Three – Wallpaper and Cupboards (read here) […]
[…] Week Three – Wallpaper and Cupboards (read here) […]